Waterfall braids are one of the prettiest ways to adorn your hair this spring. This hairstyle is a quick and easy accessory to wear for a day at the office, a night out with friends, or even a more formal occasion. Strikingly feminine and incredibly versatile at the same time, the waterfall braid can be incorporated into nearly any hairstyle of your choosing, thus adding texture, volume, and charming detail to your overall look. And the best part? This braid is not at all as complicated as it looks. Here, we show you how to achieve a stylish waterfall braid at home.
RELATED: 60 Best Braided Hairstyles for Women
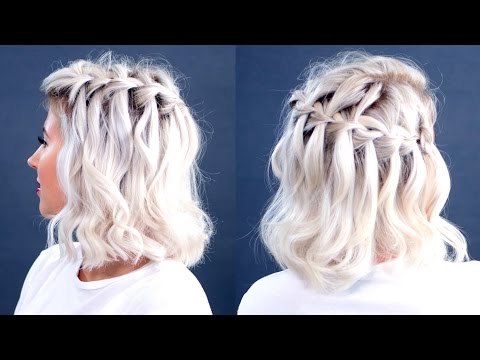
1. Waterfall Braid for Short Hair
If you’re sporting a neck-grazing haircut, the waterfall braid is the perfect look to mix things up a little. Braided tightly, all the way around the top of your head, it will grace your hair like a crown while also adding a playful twist to your style. The key to this hairstyle is braiding it along the line of your side part and loosening the stands a bit once you’re finished to create texture and volume.
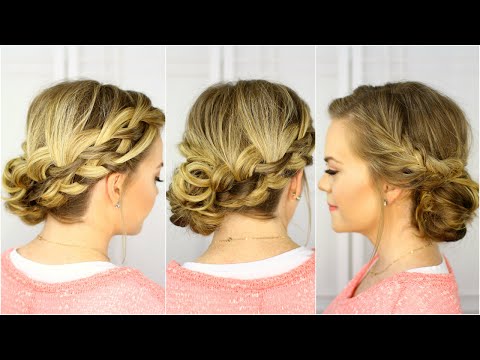
2. Waterfall Braid French Updo
This gorgeous updo hairstyle actually combines three different versions of the French braid. First, you start off with the waterfall braid, gently dropping it down to the back of your neck. Then you use the waterfall strands to braid the remaining hair on this side into a classic French ‘do. Finally, you create a fishtail braid on the other side of your head and secure everything back with hairpins and a generous amount of hairspray.
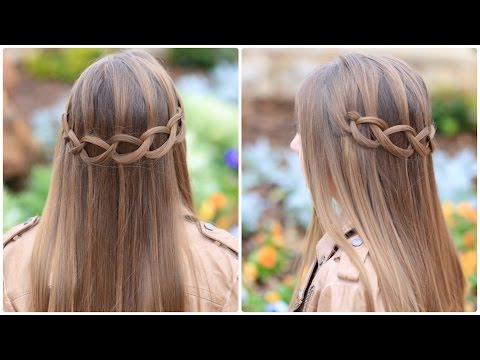
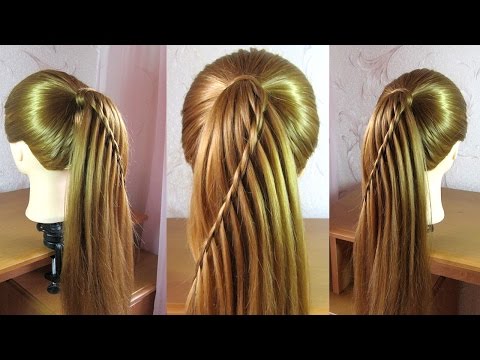
3. Loop Waterfall Braid
The loop waterfall braid may be delicate, but its wow factor is undeniable. For the best effect, straighten your hair before beginning to braid. Women with fine, silky tresses should consider using a bit of texturizing spray to help hold the loops together. The tiniest amount of wax added to each strand will also provide additional hold.
4. Triple French Braid Double Waterfall
While this triple French braid double waterfall is not as tricky as one might think, it does require a little bit of time, patience, and arm muscle. This beautiful style for long hair will carry you effortlessly from day to night without slipping up. Start with a waterfall braid down the center of your crown, dropping waterfall strands down on both sides of your head. These will later be used to French braid your remaining hair.

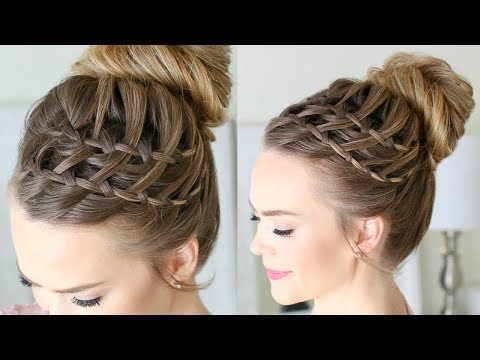
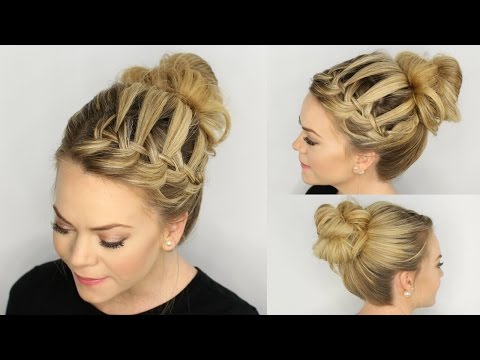
5. Double Waterfall Braid High Bun
The double waterfall braid may appear dainty and cute but requires some braiding expertise. Dividing your hair into three sections, you first create a waterfall braid in the front. The critical element of this hairstyle is incorporating the waterfall strands of the first braid into a second one right behind it. Then brush your hair into a high ponytail and use a hair tie to create a voluminous bun on the back of your head.
6. Ponytail Waterfall Braid
This super cute version of the waterfall braid is a definite eye-catcher and an easy way to upgrade your everyday ponytail. Just brush your hair into a high ponytail and wrap a small section around the elastic band. Then start braiding in the top right corner of your ponytail, only using the upper layers of your hair. After all, this braid is meant to be displayed. Drop the waterfall in a diagonal down to the bottom left corner of your hair and secure the braid with a clear elastic.
7. Waterfall Braid Messy Bun
The waterfall braid is also an easy way of enhancing the look of your everyday messy bun into an effortlessly chic hairstyle. To create the look, divide your hair into two sections and begin braiding at the front. As you are doing this, pin the waterfall strands out of the way for later use. Once the braiding job is complete, put all your hair into a high ponytail and tie it into a messy bun.
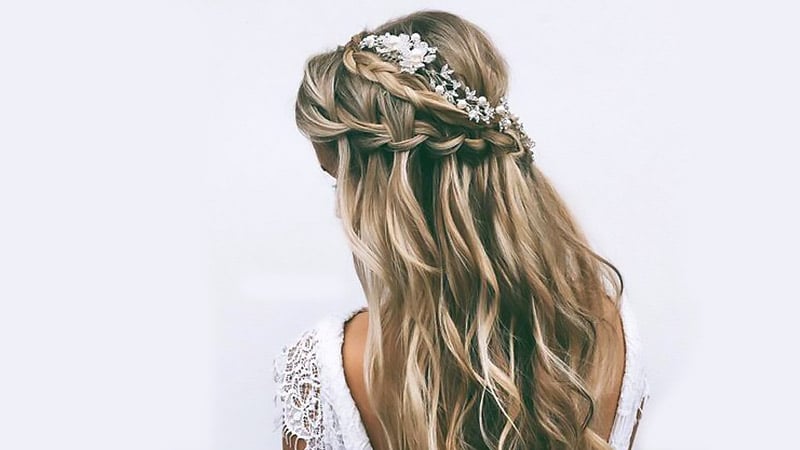
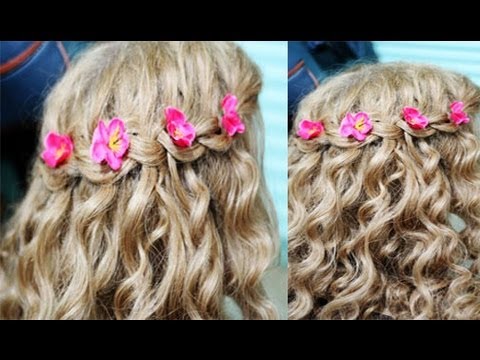
8. Waterfall Braid with Curls
Whether you have naturally wavy hair or not, a waterfall braid with curls can add a completely different vibe to your look. Big ringlets will result in a more romantic feel while loose waves tend to create a fun boho flair. A simple braid around your head will look like a pretty flower crown made of hair.
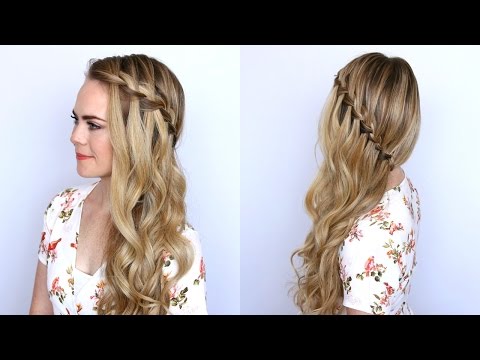
9. Waterfall Braid with Straight Hair
A waterfall braid with straight hair is probably the easiest way to begin your braiding experience. This style is quick to master at home and works exceptionally well on medium and long hair lengths. For a more concentrated effect, focus your braid on a small section of your hair and secure the end with a hair tie.

10. Boho Waterfall Braid
The boho waterfall braid is another chic yet straightforward variation of this beauty blogger’s favorite. When creating the look, make sure to braid your hair tightly to your crown and lightly twist the strands as you go around your head. Then secure the style with bobby pins. To enhance the bohemian vibe and to add more texture to the look, use a styling iron to add loose waves.

11. Sideswept Waterfall Braid
This romantic version of the waterfall braid works particularly well on thick, long hair. If your chop is on the thinner side, you can increase your hair in volume and length by adding clip-in hair extensions. To create the braid, start with a regular waterfall braid just above your forehead and gently descend it to the back of your neck as you go.
Waterfall Braids FAQs
What is a Waterfall Braid?
A waterfall braid is a chic modified version of the traditional French braid. The hair is typically braided along the upper hairline, gradually descending towards the back of your head while dropping individual strands to create a cascading effect. This braiding technique is gorgeous on its own, but it is also a beautiful addition to other updo hairstyles.
How to do a Waterfall Braid?
1. Create a deep side part and brush out any knots in your hair.
2. Grab a section of hair in the front and divide it into three equal pieces.
3. Begin braiding by putting the back piece over the middle one.
4. Follow by placing the front section in the middle.
5. Drop the new front piece.
6. Add new hair to the back section and move it to the centre.
7. Take a fresh part in the front from a slightly lower section, thus creating the cascading effect.
8. Repeat the process until you’ve reached the desired length and secure with a clear elastic.

Rose Schleicher is an experienced content and communications professional who has worked across three different continents over the past nine years. She has completed a master’s degree from the renowned London College of Fashion with extensive involvement in the cultural scene of Europe. As a creative, she loves writing about all things fashion, beauty, and lifestyle topics.
SUBSCRIBE TO OUR NEWSLETTER
Subscribe to our mailing list and get interesting stuff and updates to your email inbox.