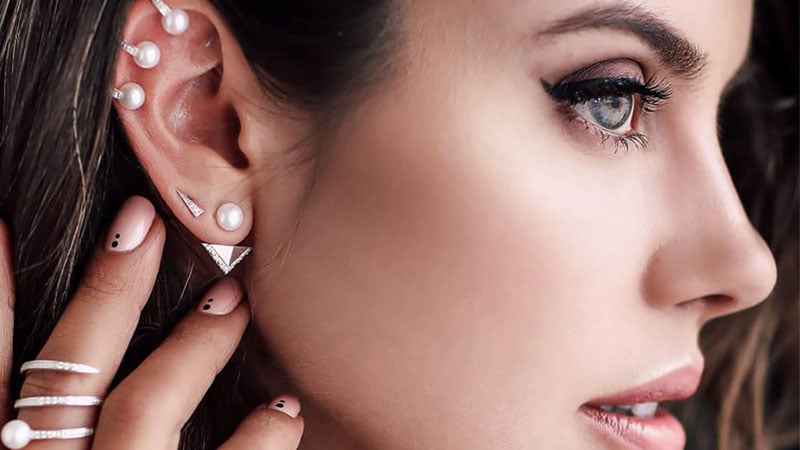
For those looking to make a stylish and unique statement with their look, ear piercings are an excellent option. With so many styles available, it can be overwhelming when deciding which piercing best suits your style and needs. Don’t worry – in this article, we break down the common types of ear piercings and explain all that you need to know about each type! From classic lobe piercing to tragus piercings and beyond, learn more about your options for expressing your personality through body modification.
Ear Piercing Chart
With so many options available for ear piercings, it can be hard to decide on the perfect one. Luckily this handy ear piercing chart outlines the different types of ear piercings, allowing you to determine not just which piercing looks best, but also which ones are safe for your body. It also provides information about aftercare for each piercing and how long it takes for the piercing to heal, so you’ll have all the necessary knowledge to make an informed decision about your unique style.
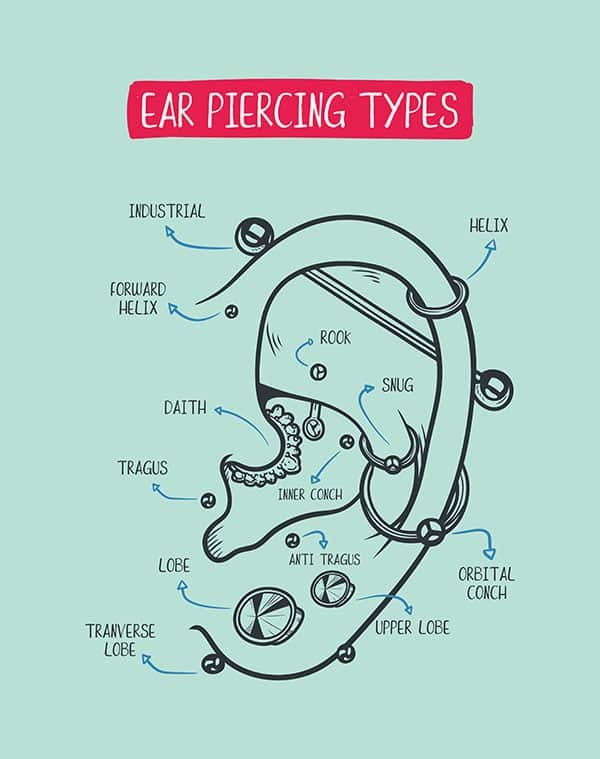
Types of Ear Piercings
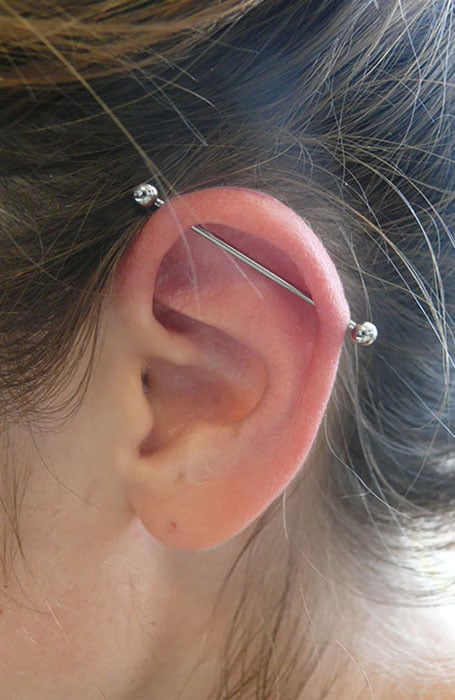
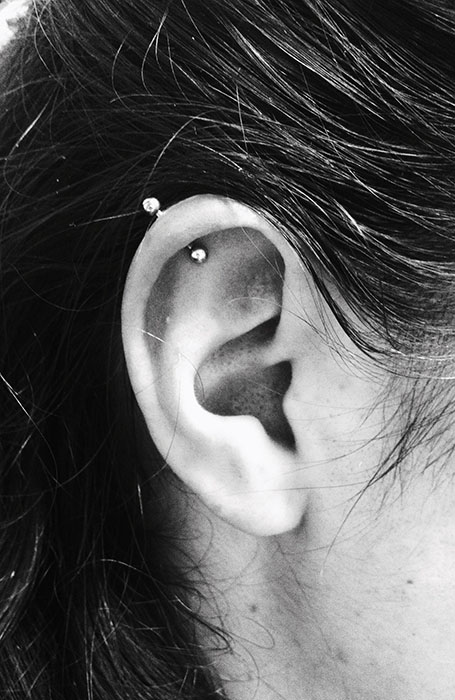
1. Industrial Piercing
An industrial piercing is a relatively bold body modification choice, and the sight of two matching studs connected by a single, straight barbell makes for an eye-catching look. Even though this piercing does require some extra care in order to heal properly and it’s generally not recommended for those with low pain tolerance, many people find that the end result is a beautiful, edgy style statement.
PLACEMENT: On the upper ear
PAIN LEVEL: 5-7/10
HEALING TIME: 4 – 6 months
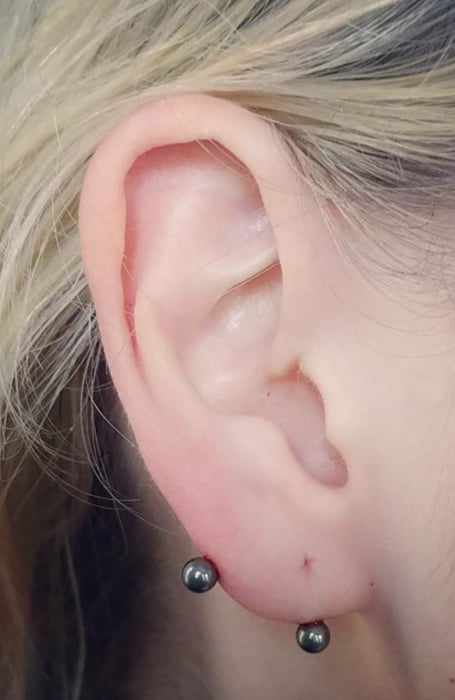
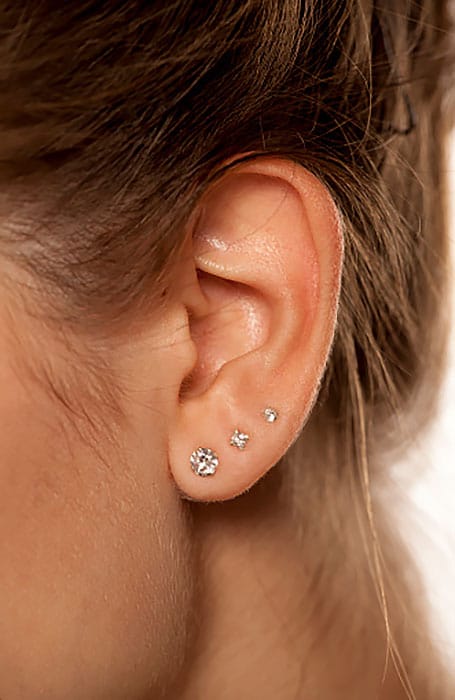
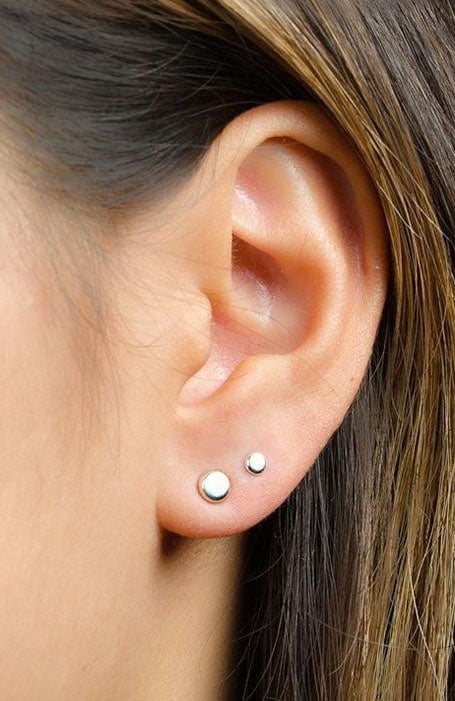
2. Lobe Piercing
As the name suggests, a lobe piercing is a piercing in the earlobe. Being in the fleshy bottom part of the ear, it is one of the least painful to get. Lasting approximately six weeks, the healing time is also one of the quickest. This piercing is very versatile once it is healed, so feel free to experiment with different styles! The possibilities are endless.
PLACEMENT: Pierced side to side through the earlobe.
PAIN LEVEL: 1/2
HEALING TIME: 1 – 2 months
3. Transverse Lobe Piercing
Transverse lobe piercings are a modern take on an old classic. With this piercing, a barbell runs horizontally through the earlobe rather than from the inside to the outside. The angle of the transverse piercing is dependent on the shape and size of the ear lobe. The only disadvantage to this piercing is that it often takes longer to heal compared to other types. This also means that a transverse piercing runs a higher risk of infection.
PLACEMENT: Pierced side to side through the earlobe.
PAIN LEVEL: 4 /6
HEALING TIME: 2 -10 months
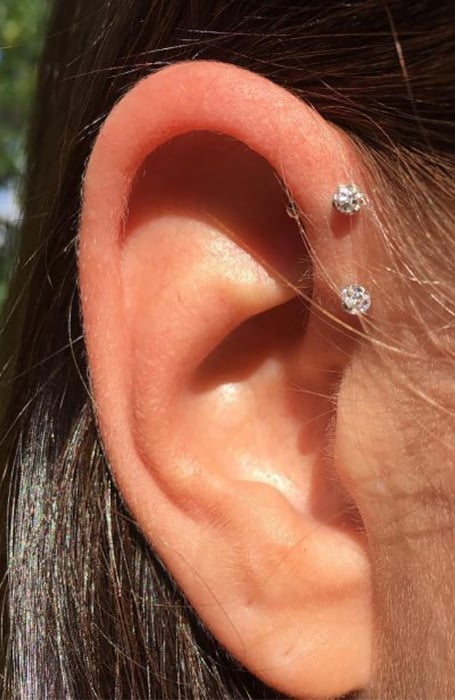
4. Orbital Piercing
Make a statement with your look – try an orbital piercing! This two-hole, one-hoop ear adornment is placed directly on the earlobe in a less painful fashion than cartilage piercings for added flair to your existing constellation. Plus, its shorter healing period of 8-10 weeks means you can enjoy it faster.
PLACEMENT: Pierced side to side through the earlobe.
PAIN LEVEL: 2 -4
HEALING TIME: 2 -4 months
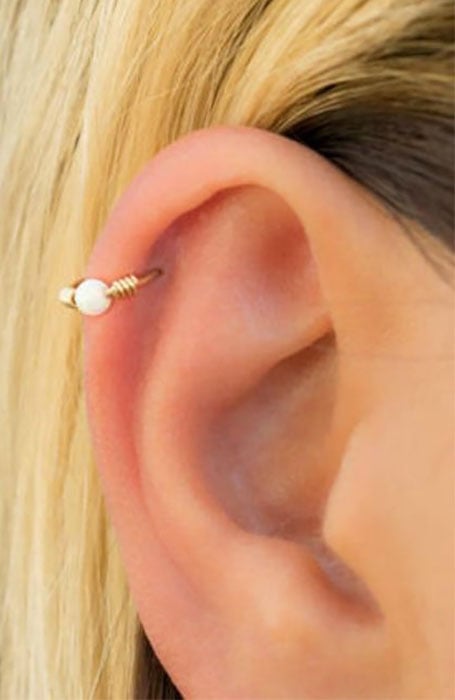
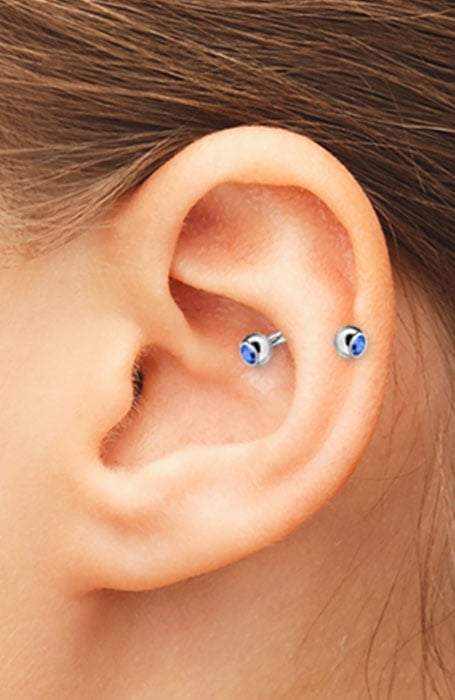
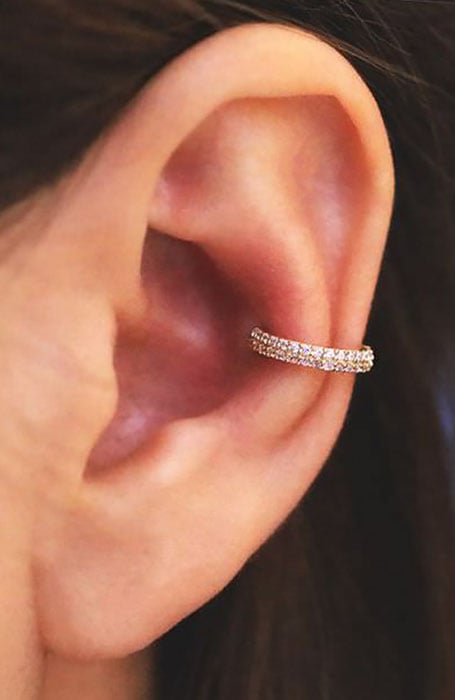
5. Helix Piercing
For a unique and stylish look, helix piercings are quickly becoming more popular than ever before. Whether you’re experimenting with one piercing on the upper outer cartilage of your ear or multiple piercings per side, these trending flat piercing allows for new possibilities in body modification while adding an element of fashion to any outfit.
PLACEMENT: The outer cartilage of the ear
PAIN LEVEL: 4 /7
HEALING TIME: 3 – 6 months
6. Forward Helix Piercing
The difference between a forward helix piercing and a regular helix piercing is the location. The forward helix piercing sits lower down the ear, near the root of the helix. Popular jewelry of this type tends to include studs, for the most part, though forward helix piercings can be used with a range of different jewelry.
PLACEMENT: Outer, upper cartilage directly above the tragus.
PAIN LEVEL: 5 /6
HEALING TIME: 3 – 9 months
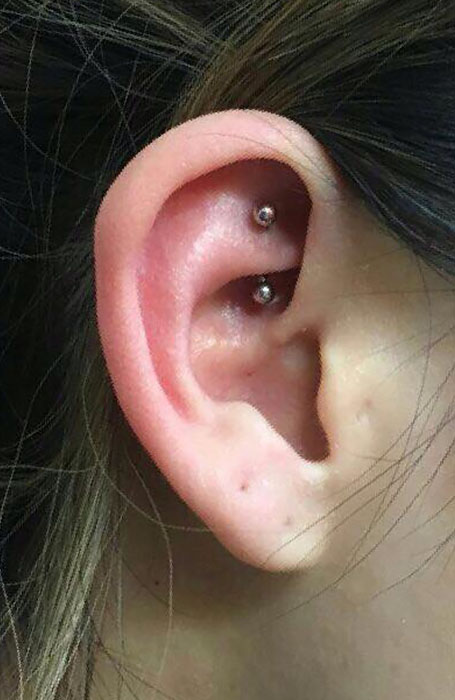
7. Daith Piercing
With its roots in Jewish culture, the daith piercing is an increasingly popular body modification. The hoop of jewelry hugs the cartilage on your inner ear and has been widely pronounced ‘doth,’ thanks to innovator Erik Dakota pronouncing it this way. A unique look that complements many people’s appearance, a daith piercing may be what you’re looking for!
PLACEMENT: Daith piercings hug the inner cartilage of the ear.
PAIN LEVEL: 5/10
HEALING TIME: Six to nine months to heal completely
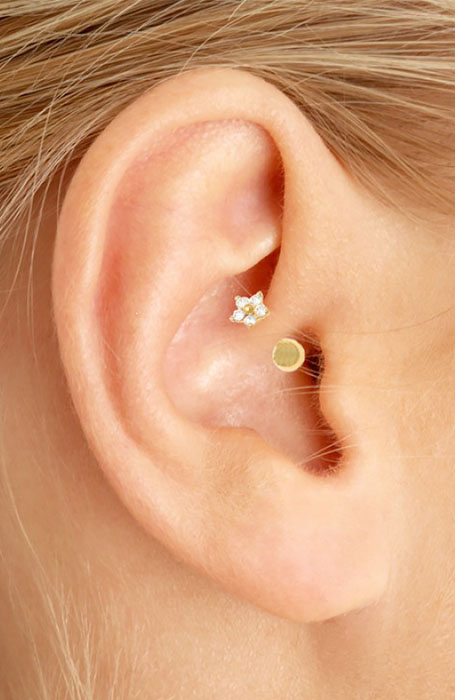
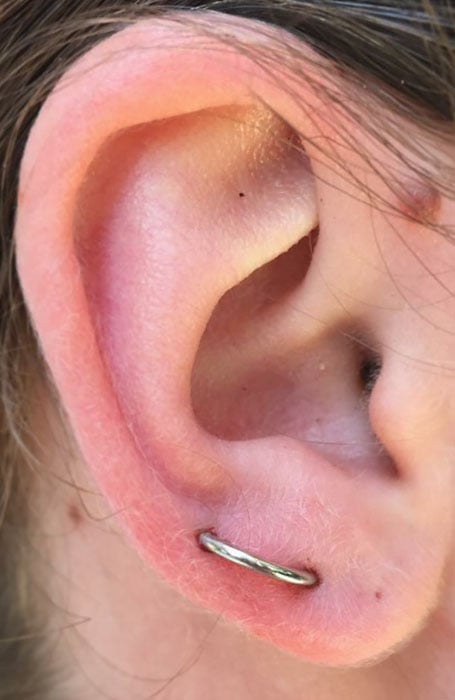
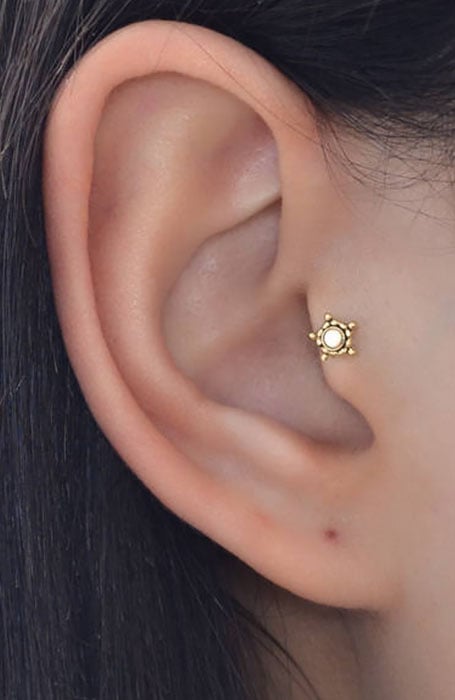
8. Tragus Piercing
The tragus piercing, which originated in the 1980s and has grown increasingly popular since then, can add a stylish edge to any look. This small piece of cartilage lies directly on your face near the entrance of your ear canal – providing for an easy visual reference point when considering where you’d like it placed among other piercings.
PLACEMENT: The small piece of cartilage over the entrance to the ear canal
PAIN LEVEL: 4/10
HEALING TIME: 6 -12 months
9. Anti-Tragus Piercing
An anti-tragus piercing is a unique and stylish body modification that sits directly opposite the tragus on your ear. But, not everyone can have this type of adornment as some people’s anatomy may make them ineligible. If you’re looking to get an anti-tragus piercing, it’s best to consult with a professional piercer first—after all, they’ll be able to tell if you have enough cartilage or not!
PLACEMENT: The small, curved area of cartilage above your earlobe and adjacent to the tragus.
PAIN LEVEL: 6/10
HEALING TIME: 6 – 12 months
10. Snug Piercing
Snug piercings, also known as anti-helix piercings, are a bold commitment. Coming in at the top of pain rankings for cartilage piercing—some even claim it is one of the most painful earrings overall—snugs sit between your inner and outer ear rims. But before you run off to get yours done: be aware that not all ears will support this type of piercing due to differences in shape.
PLACEMENT: Between the mid-helix (outer ear ridge) and the inner conch along the cartilage.
PAIN LEVEL: 9/10
HEALING TIME: 4 – 6 months
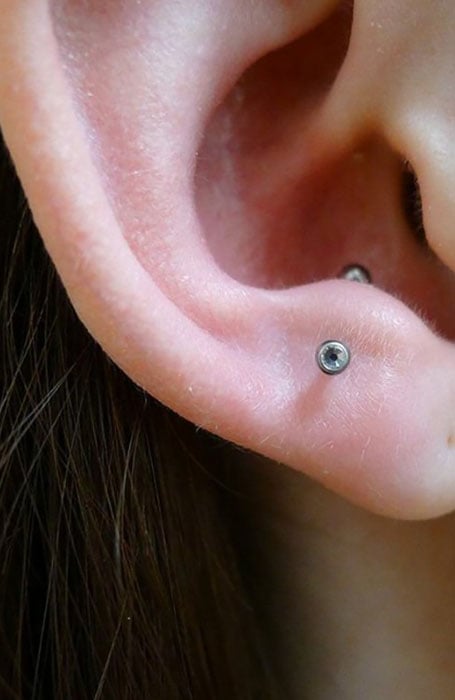
11. Conch Piercing
Conch piercing gets its name from resembling a shell located in the middle portion of your ear cartilage, which offers plenty of opportunities for customization – you can go with an inner or outer conch piercing that’s often decorated by either studs or hoops, respectively. Even better – if you have experience when it comes to dealing with other kinds of cartilage piercings aftercare routine should be familiar.
PLACEMENT: The inner part of the ear
PAIN LEVEL: 6/10
HEALING TIME: Three to nine months
12. Rook Piercing
Rook piercings are located just below the helix rim. Be aware that these can easily be confused with daith piercings; so it’s a good idea to bring reference pictures when discussing placement or going in for aftercare and cleaning. As far as caring for your rook piercing goes, general cartilage piercing care guidelines apply here – but given its unusual location within the folds of cartilage some extra attention may be needed during both healing and routine upkeep.
PLACEMENT: The upper part of the ear on the ridge between the outer and inner sections of the ear.
PAIN LEVEL: 6/10
HEALING TIME: 6 – 12 months
13. 3 Ear Piercings
The three ear piercings are a bold and unique choice for a piercing. These usually feature three studs, hoops, or cuffs in a row. Place them across your lobe or cartilage for a subtle and stylish look. Start with one or two and work your way up to the full set.
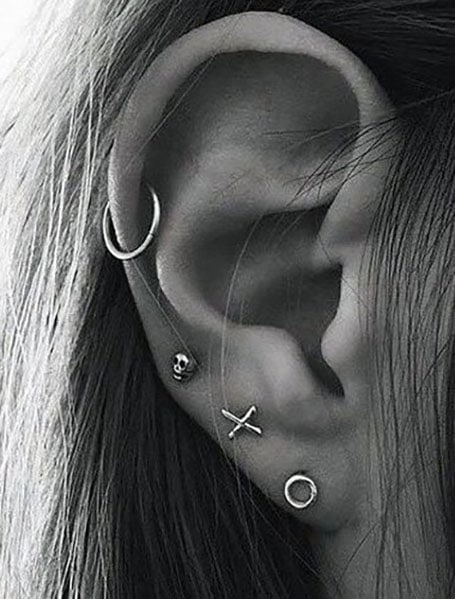
14. Double Ear Piercing
A major trend in the ’80s, the double piercing does just as the name suggests. With two earrings side by side, it can go along your lobe or cartilage, either using studs, hoops, or cuffs. You can mix and match different styles for a dynamic and unique style.
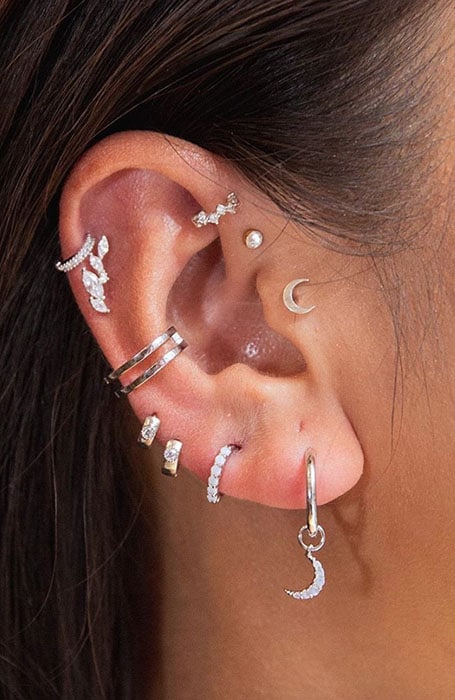
15. Full Ear Piercing
Why have one single piercing when you can go all out? Mix and match different piercings across your entire ear for a sparkling and beautiful appearance. Whether you choose a helix, tragus, forward helix, or a line of studs up your lobe, it can give you more jewelry options for your favorite outfits.
16. Simple Ear Piercing
Clean, minimalist, and elegant, the simple ear piercing is a stylish and timeless choice. This style features delicate and plain jewelry, such as silver or gold studs or small hoops. This works well if you have a handful or a few piercings.
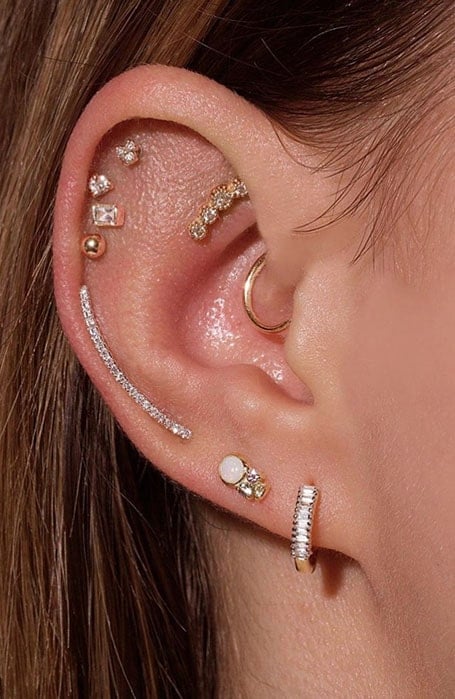
17. Unique Ear Piercings
Why blend in when you were born to stand out? Combine your favorite colors, styles, and earring types that are unique to you. Layer studs, hoops, and cuffs together in varying metals for a multi-dimensional set of piercings.
18. Top Ear Piercing
Unlike the helix piercing, the top ear piercing sits further toward the tip of the ear. The most popular jewelry featured in this location includes small hoops or sleepers and studs. For a bold look, you can mix and match other piercings, such as the lobe, tragus, or forward helix.
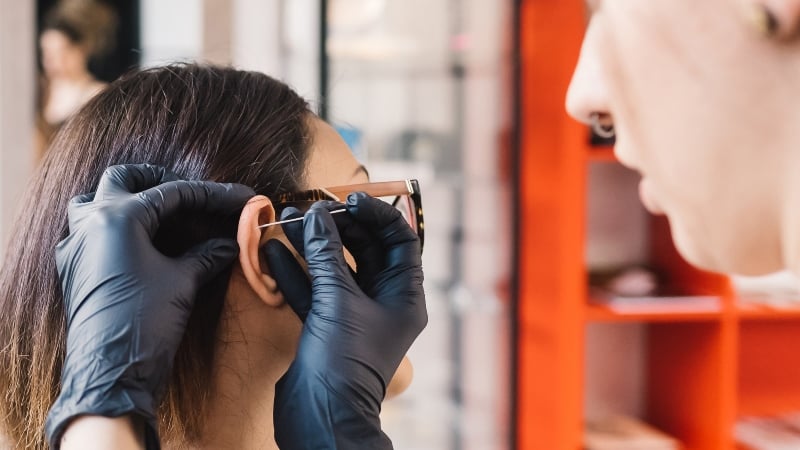
How to Get Your Ears Pierced
There are many different locations to consider when it comes to piercing your ears, each with varying degrees of pain and discomfort. Most ear piercings will pierce through cartilage and therefore need to be done with a needle at a professional studio. The exception would be with earlobes, one of the least painful and most commonly pierced areas. It can be done with a needle or a piercing gun. That said, there are some cons to the piercing gun, including proper sterilization and the fact that the tool requires little skill to operate, meaning the individual performing the piercing may not be adequately trained. This is especially true if you opt to get your ears pierced at a mall or local jewelry store.
Preparing for the Piercing
When preparing for your ear piercing, you need to consider the location of your piercing and understand the varying levels of discomfort. Some of the most painful spots include the conch and helix, while the earlobes will only cause very mild discomfort. It is helpful to do your research beforehand to have realistic expectations for the pain and healing times and find a reputable establishment. If you are getting your ears pierced with a needle, these are sterilized and individually packaged for one-time use. There are also various metals to consider for your piercing. These include stainless steel, titanium, yellow, white, and rose gold.
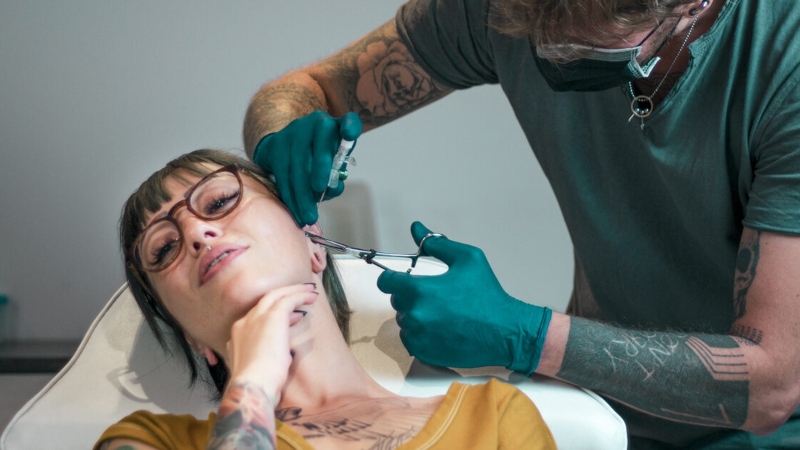
Use a Professional Establishment
It is important to use a professional establishment because these individuals are trained to pierce efficiently and safely. Your piercing will not be botched, and there is little risk of infection; because these facilities take the utmost care with cleanliness and sterilization. You also want your piercing to be handled by someone who has been well-trained and at a business with a license. To find the best shop for you, do your research beforehand. Read reviews from other people who have used it before. Ask the professional any questions or concerns you may have beforehand.
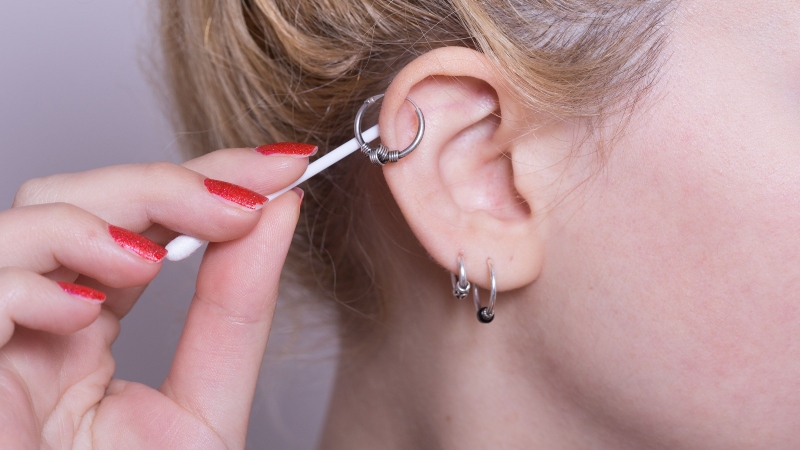
After Care
Your ears may bleed after a piercing, and this is entirely normal. Other things to consider with aftercare are how you will clean your piercing and how long it will take to heal. Depending on the chosen location, there are varying healing times, with a conch piercing taking around three to nine months to heal fully, while earlobes are the quickest, with just one to two months. Do not use hairspray or perfumes near your piercings, and avoid touching them with your hands as this can introduce bacteria. Instead, use a cotton bud and clean it every day with a gentle, antibacterial soap or saline spray. Don’t change the jewelry and leave it in; continue to clean it. You should also not remove your piercing before it has had time to heal, or it may close. If you do get an infection, consult a medical professional.
Types of Ear Piercings FAQs
What is the most painful ear piercing?
You shouldn't feel more than a pinch when the needle goes through your ear with lobe piercings, cartilage piercings are known to be quite painful, initially feeling a sharp shock before turning into a throbbing duller pain.
How much are ear piercings?
Ear piercing pricing will vary depending on the type of piercing you go for. In general, you can expect to pay between $15 to $70 USD.
How to pierce your own ear?
Piercing your own ear involves many steps to correctly sterilize and prep the ear for piercing. It is advisable to see a professional to pierce your ear who has many hours of experience in the task at hand.
How to clean ear piercing?
Using a cotton ball or pad dipped in rubbing alcohol, gently clean the skin around the piercings twice a day to keep away germs and prevent scabbing. You may also apply a thin coat of petroleum jelly around the opening.

Alexandra Feiam is an experienced fashion writer who holds a degree in journalism. She has an impressive portfolio and expertise working as the Editor at Power Retail and Commercial Content Editor at Newscorp. Ally has been writing for The TrendSpotter since 2018, and her work has been featured in notable publications such as The Herald Sun, Arirang TV South Korea, Kidspot, The House of Wellness, and The Daily Telegraph.
SUBSCRIBE TO OUR NEWSLETTER
Subscribe to our mailing list and get interesting stuff and updates to your email inbox.