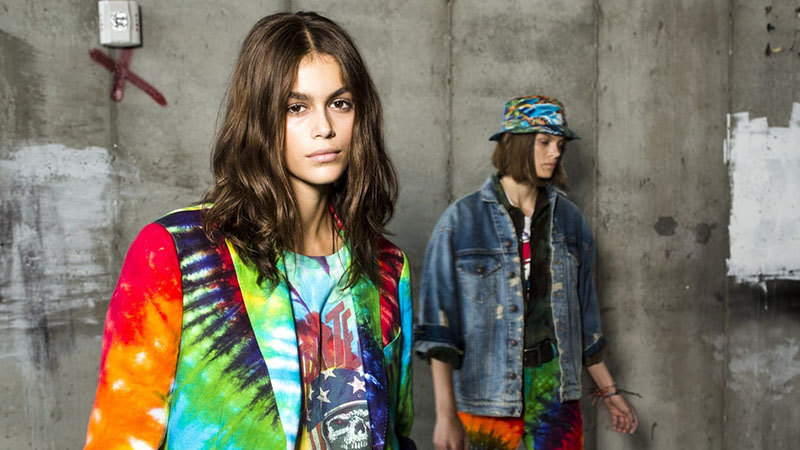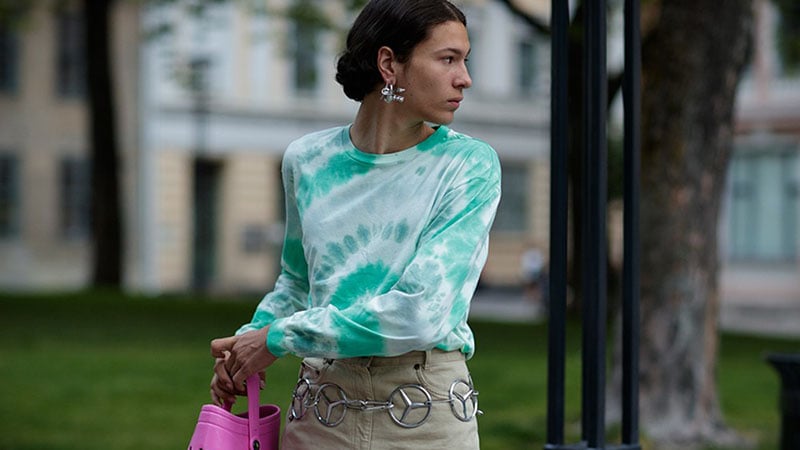
It’s one of the trendiest pieces of clothing of the season, and we can easily see why. This free love-inspired getup is easy to style with almost any outfit and is sure to brighten up a room. What’s better is that you can make them yourself. Using only a few items and a free afternoon, you can easily recreate some of the hottest looks from the runway to your backyard. If you’re ready to take the world by storm, here’s how you can tie dye like an expert.
Tie Dye Product Essentials
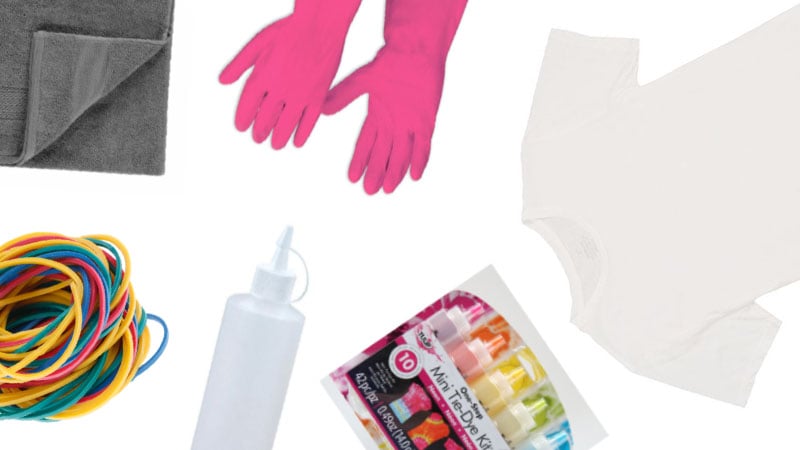
Creating a tie dye piece of clothing is an easy and fun way to spend the day. This is what you will need to get started:
- Rubber gloves
- Rubber bands, elastic string or hair elastics
- A towel or plastic tablecloth
- Bleach or dye
- Plastic spray bottle or a squeeze bottle
- T-shirt, dress, trousers or a skirt you would like to tie dye.

Decide on the Design
The possibilities behind this trend are endless. With so many different designs to choose from, you can create new tie dye pieces and always make them look unique. Choose from a traditional spiral, or try your hand at a heart-shape, use chevron technique, or design a pattern with ice. The beauty behind this stunning project is that you can make something that is truly one of a kind – just like you.

Prepare the Space
Tie dye pieces of clothing are super fun to make, but they’re also very messy. When setting up, it’s essential to lay down a towel or a sheet to protect the surface you’re working on. If you’re going to create an ice style, you’ll also need a large plastic container and dish drying rack. Next, take the T-shirt or item of apparel you’d like to design, and then prepare all of the tools listed.

Tie Dye Patterns
Spiral Bullseye Tie Dye
The spiral tie dye design is one of the most traditional styles, and it’s straightforward to replicate. To begin with, you’ll need to prepare a pre-soaked white T-shirt, colored dye, and rubber bands.

- Place the T-shirt flat with both arms laid out evenly. Using the armpits, find the center of the fabric and pinch. Using the pinched center of the T-shirt, begin to sit the cloth, pinch, twist, and feather it out, so it’s a tight circle. Remember, the closer you make the folds, the less ink and dye will penetrate the material.
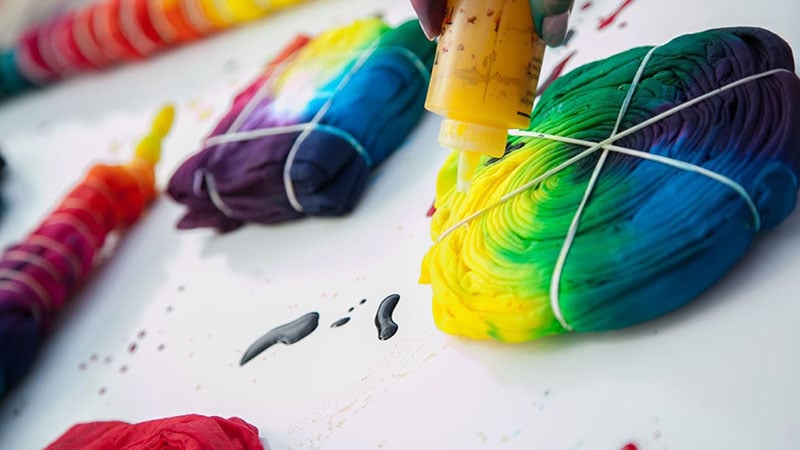
- Once you’ve mastered the feathering technique, keep the curled fabric flat and slide rubber bands over the top to maintain its shape. Be sure to place three or four in contrasting positions to create wedges that look like slices of pizza.
- Grab whichever shade you’d prefer to use first and color the wedge with the ink entirely. Start by drawing around the edges of the shape and fill in the rest. Continue with the other sections until it’s completely covered with the colors of your choice. Then, flip the shirt over and repeat the same process.
- Wait 24 hours for the ink to dry before removing the rubber bands and unfolding the fabric. When the dye is no longer wet, wash the T-shirt, and voila! You’re ready to go.
Stripe Tie Dye
A fun and fresh way to tie dye a shirt is with a striped pattern. You may opt for shades like baby blue, pink, or red – it’s a funky addition to any wardrobe. For this, you’ll need a T-shirt, gloves, a tub, a spoon or spatula, rubber bands, and ink. Before you start, prepare a dye bath with the shade of your choice. To do this, mix the color with some water and activator in a tub.

- Take the T-shirt and soak it in water. Wring it out, so there’s no moisture left, and gather the top section of the fabric. Place a rubber band around it several times – this will ensure a set of bold, white stripes.
- Complete the same steps down the body of the T-shirt. Try to make sure each of the rubber bands is located evenly down the fabric. You can use different sizes if you prefer varying designs.
- Grab the item of clothing and submerge it into the dye bath that you prepared earlier. Using a spatula or spoon, press down on the T-shirt to fully spread the color into the fabric.
- Let the T-shirt sit in the dye for an hour. When it’s finished soaking, you can remove it and wash the excess color out.
Heart Tye-Dye
If you’ve ever wanted to wear your heart on your sleeve, here’s your perfect chance. This cute and flirty tie dye design is sure to turn heads, and it’s an excellent choice for a casual outfit. For this project, you’ll need a pre-soaked T-shirt, colored ink, rubber bands, and gloves.

- Spread the T-shirt on your surface and fold it right in the middle, from sleeve to sleeve. Grab a washable marker and trace out half of the heart shape in the center of the fabric.
- Pinch the fabric at the bottom of the marked heart and begin to fanfold up the side of the shape. Take your time with this as you work your way around the line, ensuring you move the T-shirt with you as you go. Take your rubber band and secure it in the upper half of the material.
- If you would like to add more stripes to your design, add a few extra rubber bands across the bottom half of the T-shirt. Grab your dye and start filling in the heart. Be careful when coloring this in, as you’ll want to stay within the lines to maintain its shape. You can then continue to apply the ink to the rest of the fabric. Repeat on the other side.
- When you’ve completed the dyeing, carefully place the T-shirt into a plastic bag. Ensure the colors aren’t touching each other, as they may begin to bleed. Close the bag, and wrap the fabric up slowly, removing any excess air from inside. Wait approximately eight hours, and then rinse in a tub.
Ice Tye-Dye
The ice tie dye design is a daring style to wear – it’s sleek, stylish, and full of colors. Unlike traditional methods, this hypnotizing T-shirt uses ice cubes to formulate the patterns, so you’ll want to do this one outside. To begin, ensure you have a large container, a raised dish drying rack, a pre-soaked T-shirt, dye, and ice cubes.

- Place the dish drying rack in the large container, and put the pre-soaked T-shirts on top of the platform. Crumple them up, so they appear lumpy and messy.
- Using a cup, pour the ice cubes across the top of the T-shirts, covering them sporadically.
- Now it’s time to add the dye. Pour the shades you’d like the T-shirt to be over the ice, ensuring that there’s enough of the color to soak into the fabric. You can use varying patterns and designs across the material – have a bit of fun with it! Just make sure you’re wearing gloves – otherwise, you’ll stain your hands.
- Let the ice cubes sit on the T-shirt until they have melted entirely – you can leave it overnight or during the day. This will create the perfect blend of color and clean fabric, leaving behind a funky pattern. It’s best to keep the bottom of the rack fully covered with either a towel, sheet, or container, as the dye and water will drip everywhere.
- Rinse the excess dye from each part of the fabric – this will prevent any staining on your skin before you wear it. Let the T-shirt air dry for a few hours, and you’re ready to showcase your new piece of clothing.
Chevron Tye-Dye
Chevron or Shibori design is one of the most elaborate and stylish ways to create a fun T-shirt. The multi-fold process creates a zig-zag pattern, which you can easily style with any outfit. To create this, you’ll need a ruler, pre-soaked white T-shirt, string, a washable marker, and dye.

- Lay down your T-shirt on a flat surface, and then fold it in half twice. Using a ruler and washable marker, draw diagonal lines down the fabric. Make sure it’s even as you make your way to the bottom.
- Grab the top of the shirt and pinch the corner where the marker begins. Slowly gather the fabric down the line until you’ve reached the bottom. Using string or a rubber band, tie the collected piece until it’s secure.
- Repeat the process across every line drawn on the T-shirt until you’ve reached the end of the fabric. Feel free to add a few extra patterns in the empty spaces in between the rubber bands – for a unique touch.
- Begin dipping each section of the fabric into dye. You can use a huge range of colors, or just one or two – it’s entirely up to you. Repeat the process until it’s fully soaked in your desired shades.
- Let the colors soak for a few hours, and then rinse the excess dye out of the fabric. Once it’s washed, you can remove the bands and unfold the T-shirt. Watch as the diagonal lines turn into delightful zig-zags!
How to Tie Dye FAQs
What kind of paint do you use to tie-dye a shirt?
The great thing about tie-dye is that there are several ways to do it. In addition to paint and fabric dye, you can also use food coloring. To do this, you will need to mix the coloring with water and add several drops to the mix. Fill a different bottle for each shade you intend to use. You should use polyester fabrics instead of plant-based ones as these will retain the color better.
What can I use instead of bleach for tie-dye?
The appeal of tie-dying is that many people use their household items to complete the process; this means that you do not have to have bleach. As an alternative, consider using white vinegar, which will help the color bind. Start by mixing the vinegar with water and soaking your clothing in it for several hours to prepare it for the dying process.
Do you mix tie-dye with hot or cold water?
It is advisable to use hot water for the final rinse out of your tie-dye. Hot water can also help speed up the process and allow the dye to be absorbed into the fabric faster. That said, each fabric has a different maximum temperature that should be considered; for example, natural fibers like cotton, linen, and silk should use water from 60 to 71°C. There are various methods you can try to color your garments, including ice tie-dye or using cold water to prevent the colors from bleeding.
Can you tie-dye things that aren't white?
You can tie-dye things that are not white, but you will then use bleach to create the same effect on a dark garment. You can also pick lighter colored items and use dark dyes, such as deep blues and reds.

Alexandra Feiam is an experienced fashion writer who holds a degree in journalism. She has an impressive portfolio and expertise working as the Editor at Power Retail and Commercial Content Editor at Newscorp. Ally has been writing for The TrendSpotter since 2018, and her work has been featured in notable publications such as The Herald Sun, Arirang TV South Korea, Kidspot, The House of Wellness, and The Daily Telegraph.
SUBSCRIBE TO OUR NEWSLETTER
Subscribe to our mailing list and get interesting stuff and updates to your email inbox.